












Selecting the ideal peeler, zester, or canneler
Peeler or Vegetable Peeler
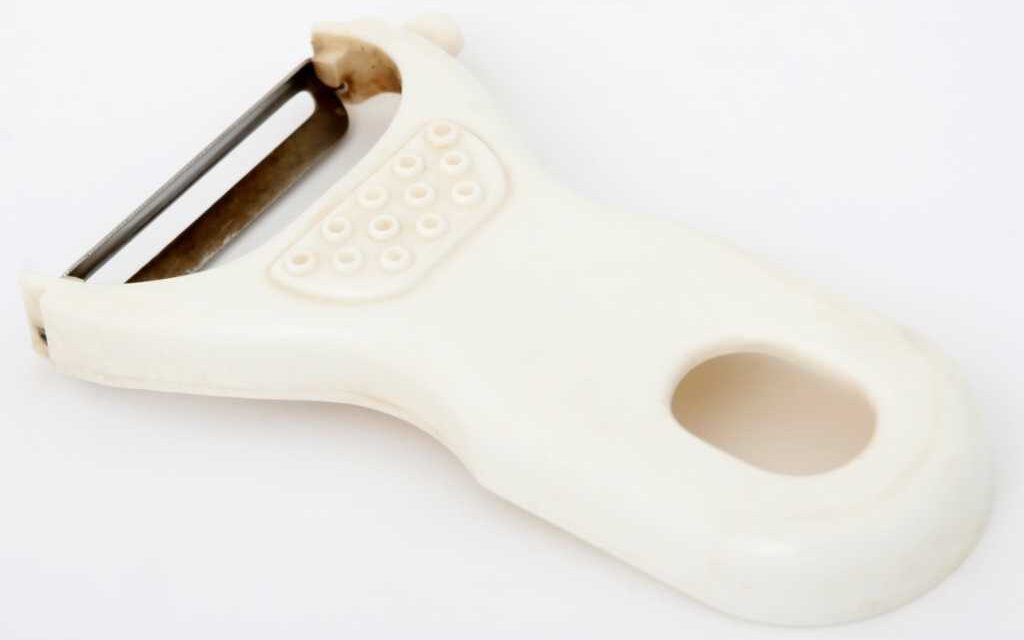
Also called a “vegetable peeler.” This tool is designed to peel potatoes and other vegetables with a skin. A peeler is a kitchen utensil that should not be missing from your kitchen.
Why should you use a peeler or vegetable peeler?
A vegetable peeler is one of the most popular and ingenious kitchen utensils used today. Many new tools have appeared over time. But the vegetable peeler has retained its importance even among them.
After replacing the knife for peeling vegetables, the peeler is a tool with a metal blade attached to a plastic handle. A bit like a knife, but with several advantages. There are two main types of peelers.
The swivel peeler (with a blade that moves and is unlocked) and the straight peeler. The blade can also be of two types: serrated or smooth. The serrated blade is better suited for peeling vegetables.
Why are they among the most popular kitchen utensils? Let’s look at several advantages of using peelers for peeling vegetables.
- They peel perfectly!
Peeling with a knife often leads to removing unnecessarily thick skin. The peeler, on the other hand, is known for removing the thinnest possible layer of vegetable skin and does so evenly.
As a result, necessary nutrients are not wasted. This ensures efficient use of the vegetable without wasting the product. During the peeling process, they peel perfectly!
- Peelers or vegetable peelers are safe
The plastic handle of the peeler ensures that you are at a safe distance from the blade. And the blade itself is unlikely to cause serious injuries. They allow you to safely and efficiently handle carrots, potatoes, cucumbers, and other vegetables while peeling them effectively.
- Swivel peelers are very easy to use
Swivel peelers have blades that can move within the plastic handle. This allows the blade to follow the contours of the vegetable you are peeling and efficiently peel uneven surfaces.
- They can also be used to cut thin slices
Vegetable peelers are also ideal for slicing a vegetable into thin strips. Squash for sandwiches or potatoes for fries, for example.
8 Ways to Use Vegetable Peelers
Sometimes, it’s hard to improve on a classic kitchen tool. Yes, new tools are exciting—being able to use a sous-vide immersion machine, make soft-serve ice cream in an instant, or juice just about anything is a joy.
But it’s comforting to know that some old-school tools remain unbeatable. Enter the vegetable peeler. This gadget is undeniably simple and effective.
But did you know it can do much more than just peel potatoes? This guide shows you how to make the most of this powerful tool by trying different uses.
- Peel vegetables
To start, we recommend using your peeler as intended—for peeling fruits and vegetables. A vegetable peeler will not only help you prepare apples,
but you should also have a peeler on hand when handling fruits with softer textures. Mangoes and kiwis can be difficult to cut due to their tough skin and soft flesh.
But with a peeler, you’ll have them ready in no time. Plus, the result will be much neater than if you tried to cut the skin with a knife.
Tip: If you’re making tomato sauce, use your peeler to remove the skin from blanched tomatoes. This will improve the texture, and you’ll be surprised how easy it is.
- Trim celery
Celery is a refreshing and healthy snack to eat with a dip, but its stringy fibers can get stuck in your teeth and be extremely annoying.
After rinsing and cutting your celery, inspect it with your peeler in hand. Are there fibers sticking out in odd places? Run the peeler along the celery stalk where it protrudes and watch the stringy bits fall away.
- Make zucchini noodles
Before the rise of spiralizers and mandolines, there was salad—a fresh salad of wide, thin vegetable ribbons. Vegetables of all kinds are delicious, but zucchini is an exceptional choice for this recipe.
The size and firmness of zucchini make it easy to create thin ribbons. And its moisture content allows it to absorb any seasoning like a sponge.
If you prefer, you can also blanch your ribbons and create a low-carb pasta alternative. To make the ribbons:
- Rinse your zucchini, dry it, and hold it upright.
- Peel away from yourself in a downward motion, and you’ll end up with a nice long ribbon.
- Continue until the entire vegetable is transformed into a pile of ribbons.
- Dice onions
Peeling onions can be a tedious experience. Avoid tears and ensure you get a fine slice by using your peeler for the task. Since the slices will be thin, they make great additions to dishes without overpowering bites.
- Cut your onion in half and hold it in your hand, cut side up.
- Then simply peel off delicate slices. You’ll find it’s much quicker and easier than trying to chop with a knife.
- Shave cold butter or hard cheese
There’s not much more comforting than a perfectly buttered piece of toast. Here’s how to avoid crushing your toast when applying cold butter:
- Use a vegetable peeler to shave ultra-thin butter curls that will melt quickly and evenly on toast.
- Store shaved butter in the freezer in a plastic bag for quick and convenient use.
Vegetable peelers are also useful for transforming a block of hard cheese into an ideal topping for salads, soups, or vegetables. If you want a smaller portion or prefer larger pieces of cheese, a vegetable peeler will serve you better than a grater.
- Take the peeler to the edge of a piece of Parmesan.
- Start shaving cheese slices away from the block. The firmer the cheese, the more effective it will be.
Tips: If the cheese has been sitting in your fridge longer than you’d like, you can peel off the exposed area to get the freshest pieces.
- Shave Chocolate Shavings
A simple way to elevate almost any dessert is by adding chocolate shavings. Whether you’re putting the finishing touch on a spectacular cake, or making a weeknight bowl of ice cream a little more special, creating chocolate shavings using a vegetable peeler is a great trick.
- Use the peeler to shave pieces a few centimeters long that can be sprinkled on anything.
- Make a whole bowl of shavings ahead of time and store them in a plastic bag in the fridge.
- Hold your bittersweet chocolate bar in one hand and peel in the other, letting the shavings fall directly onto your dessert.
- Peel Citrus Fruits
Lemons, limes, and oranges all have peels with a slightly brighter flavor than their fruits. A vegetable peeler can add some zing to your drinks and recipes. Peelers are the bartender’s best friend.
You can make short peels for a touch of color or carefully use a vegetable peeler to carve your way around the fruit, making a long spiral that can hang over and into a glass.
For better flavor impact, twist the citrus peel over the glass, then pass it, pith side down, over the edge of your drinking glass before letting it fall into the drink.
- Don’t have a zester on hand? No problem. Your peeler has you covered. Simply peel the lemon or lime, then chop the pieces with a chef’s knife.
Tip: Chopped citrus can be used immediately or stored in the refrigerator or even the freezer in a freezer-safe container.
- Non-Food Uses for Vegetable Peelers
Vegetable peelers are also useful outside the kitchen. If you have a bar of soap that looks better in the mornings, freshen it up using a vegetable peeler. Simply remove the outer layer, where dirt may have accumulated.
You’ll create a fresh soap bar, good as new. You can also use a vegetable peeler to sharpen writing utensils, like pencils, charcoal, chalk, and even eyeliner.
Their shape and size make it easy to shave the outer wood of your pencil or develop a useful point by shaving each side to one point.
Tip: We recommend keeping a second peeler on hand for non-food projects to avoid cross-contamination.
Types of Vegetable and Fruit Peelers
There are several types of fruit and vegetable peelers available today. Some peelers are optimized for specific products, and others can handle a variety of tasks. In this guide, we’ll cover the main types of peelers.
- Swivel Peeler or Jonas Peeler
First, we have swivel peelers (also called “Jonas” peelers). Swivel peelers are probably the first style that comes to mind when you think of a “vegetable peeler.” They have a double blade extending from the handle and pivot with pressure to keep the blades scraping the skin of fruits and vegetables.
- Their Advantages
- Great for long vegetables like carrots, parsnips, asparagus, and broccoli stems. Or for smaller, firmer vegetables like medium or small potatoes.
- Can also handle firm products like potatoes, sweet potatoes, butternut squash, and apples.
- Usually comes with a potato eye remover at the tip.
- Their Disadvantages
- Not great for more delicate produce like citrus, tomatoes, and eggplant.
- Y-Peeler
This peeler looks like a slingshot, and like the swivel peeler, the blade also pivots under pressure. If you already have a peeler at home and it’s not a swivel peeler, chances are it’s a Y-peeler.
- Their Advantages
- Great for larger, firmer vegetables like large potatoes, sweet potatoes, butternut squash, and apples.
- Can also handle smaller potatoes, sweet potatoes, and apples, or thin vegetables like carrots, parsnips, and asparagus.
- The Y-peeler is a favorite among professional chefs because the long reach of the handle increases control.
- It’s also quicker to use once you’ve mastered it.
- Their Disadvantages
- Not great for more delicate produce like soft citrus, tomatoes, and eggplants.
- May (or may not) have a potato eye remover.
- Serrated Peeler
Serrated peelers are available in both straight swivel models and Y-handle designs. They’re just like their straight-blade cousins, except for the serrated edges. If you’re wondering why this seemingly small variation exists, the main advantage of a serrated peeler is its effectiveness on delicate produce.
- Their Advantages
- The serrated peeler is the only one that works well on softer, thinner-skinned products.
- Ideal for tender fruits and vegetables like peaches, tomatoes, and eggplants.
- Their Disadvantages
- The serrated peeler is not very versatile.
- It’s difficult for firmer products because it may not glide as easily as straight-edged peelers.
- Julienne Peeler
A julienne peeler is an interesting variation of the peelers we’ve looked at so far. It looks much like a serrated peeler, but the blades themselves have larger “prongs” that are more spaced out. This allows the julienne peeler to turn a vegetable (like a zucchini or carrot) into thin strips that can be used as “vegetarian pasta,” or in salads, etc.
- Their Advantages
- Ideal for making vegetarian pasta or vegetable strips for salads
- Their Disadvantages
- If you just want to peel the vegetables (and not turn them into strips), you’d better use another peeler
- Finger Fixation Peeler
This peeler works like a ring, with the blade inside the plastic coating. If you’re looking for a more ergonomic option but don’t want to use a rotating peeler, a finger fixation peeler is a good choice. It allows you to peel fruits and vegetables without gripping a handle. You can also get a variant of this tool designed for zesting (e.g., for citrus fruits like lemons).
- Their Advantages
- The palm peeler allows you to peel without gripping a handle.
- Some versions have two rings, which can be more comfortable for some hands.
- Their Disadvantages
- You can’t exactly see where you’re peeling.
- Double-Edged Peeler
The double-edged peeler looks like a pivoting peeler, except that the part of the blade extends from the handle and remains rigid. Generally, it has a handle wrapped in twine, although many models no longer feature this functionality today.
- Their Advantages
- Ideal for all sizes of firm vegetables or fruits, from large and round to small and narrow.
- Great for ginger root and citrus fruits.
- Offers more control than a pivoting peeler.
- Very versatile.
- Their Disadvantages
- Hard on softer products like citrus fruits, tomatoes, and eggplants.
- Can cause wrist fatigue if peeling a lot.
- If it has a handle wrapped in twine, it may not be dishwasher safe.
- Rotary Crank Peeler
This is the first type of mechanical, non-portable peeler on this list. To use these industrial-looking gadgets, you insert the apple, turn the crank, and the peel comes off in a long spiral strip. It’s a great option if you plan to peel large quantities of potatoes, apples, or other firm produce.
- Their Advantages
- Even very young children can turn the crank.
- Cleaning the peels is easy.
- Ideal for large volumes of apples or potatoes.
- Their Disadvantages
- Must be anchored to a table or countertop.
- Takes longer to clean than manual peelers.
- Takes up more space.
- Electric Rotary Peeler
This is essentially the same as the manual rotary peeler, except it doesn’t require elbow grease. If you’re choosing between an electric peeler and a crank peeler, the electric model will require less effort. However, an electric peeler is a bit more expensive and probably won’t last as long as a crank model, given the additional electrical components.
- Their Advantages
- Easy to use
- Good option for people with arm or wrist problems
- Their Disadvantages
- Requires electricity
- More expensive than most other peelers
- May not last as long as other peelers due to the electrical components
What to Look for When Buying a Vegetable Peeler
Having the best vegetable peeler can offer you a pleasant peeling experience. Since there are so many varieties on the market, we’ve put together this buyer’s guide to point you in the right direction. Here’s a list of qualities that might help you in your search:
- Style
The two main types of vegetable peelers you should know are the pivoting and Y peelers. The pivoting peeler has a vertical blade that you use with a back-and-forth motion. The Y type, on the other hand, has a flat edge that you use to peel up and down. Of the two, the pivoting peeler is usually easier to use and much sharper. The Y peeler is mainly used to peel potatoes. The type of peeler you choose will depend on your prep needs.
- Blade
There are different blades used for vegetable peelers. They can be ceramic, stainless steel, or carbon steel. The stainless steel version is the most popular choice because ceramic blades tend to break easily, and carbon blades may rust more quickly.
- Durability
You certainly want a durable peeler to get value for your purchase. You want it to be sturdy and capable of helping you prepare large meals. That said, make sure to choose a vegetable peeler made from high-quality materials that will last a long time.
- Design
When you buy a product, of course, you expect it to work as promised. On that note, avoid cheap peelers that are poorly designed. Even if they work perfectly, they’re not designed to last or be fully efficient. It’s wise to consider a peeler that won’t clog up and will save you time rather than adding to the mess in your kitchen. These are just a few factors to consider.
For top chefs, doing proper research and learning about the tools they need can make a difference when buying an item that can help them create high-quality meals.
Another tip worth considering is to look for those with experience in vegetable peelers. Using your social network usually leads you to a good idea of what you want and need, whether it’s the best potato peeler or the best julienne peeler.
- Handle
The best advice is to find a peeler that works for you. Peeling fruits, vegetables, and citrus requires repetitive motions. It’s entirely normal for you to opt for a peeler that’s easy to use. So, feel free to look for a peeler with a non-slip handle, no matter which model or brand you choose.
- The Material
The most common materials for vegetable peelers are stainless steel and carbon steel. The material is dishwasher-safe and also sharp. However, it is prone to rusting over time if not properly maintained.
The Zester
Composed of a perforated blade with a row of round holes and curved on the side opposite the handle, the zester resembles a small knife used for zesting citrus fruits as well as other types of fruits and vegetables.
Type of Zester
The type of zester you need depends on what you’re cooking or baking. Zesters are available in different blade strengths, sharpness, and designs, and each style will create a specific type of zest.
For example, some products are specifically designed for zesting citrus fruits, such as limes and lemons. They won’t work as well on chocolate. If your recipes require zesting soft foods like fruits or ask for more decorative zests, you may want to purchase a zester designed for these items. On the other hand, if your kitchen or bakery requires grated food like nuts or cheese, you’ll want to purchase a zester-grater combo that has a sharp, durable surface made of stainless steel. Most lemon zesters are versatile and can handle both types of zest.
Cleaning a Lemon Zester
If you buy a lemon zester made from high-quality rust-resistant material like stainless steel, very little maintenance is needed to keep your essential kitchen tool in top condition. However, you should always clean the zester thoroughly to ensure that the chrome coating remains solid and the tool stays free of bacteria. After each use, you can put the zester in the dishwasher if it’s dishwasher safe. You may want to give it a pre-clean by running it under hot water and gently scrubbing with dish soap. If zest gets stuck on the blades, you can use a kitchen brush or a vegetable brush to remove it.
Avoid cleaning the zester with scouring pads or steel wool. These materials are often too abrasive and can strip away the protective coating from the zester.
- Hand Cleaning
If you’re cleaning it by hand, wash the zester in warm water with dish soap. Dry it with a clean towel before storing it safely.
It is recommended to store the tool in a protective cover whether it’s kept in a drawer or hung in your kitchen. The cover ensures the blades don’t dull and that you don’t injure your fingers. It’s also best to store the zester in a cool, dry place to protect it from moisture.
The Difference Between a Grater and a Zester
Zesters are specifically used for citrus fruits to get long, thin strips of zest. They are small, with just a few round holes that you scrape along the fruit.
A grater, on the other hand, is more versatile. You can zest citrus with a grater, but you can’t necessarily shred vegetables with a zester.
When zesting with a grater, the result will resemble grated ginger in consistency compared to the more robust strips from a traditional zester.
Different Ways to Use a Zester
A zester is a versatile and useful kitchen tool, and there are many ways to use it.
- Removing Citrus Peel
Gently pass the citrus along the zester to remove the thin slices, making sure not to remove the white pith. This is the bitter part of the fruit and will definitely give your recipe a bitter taste.
- Grating Whole Spices
Carefully rub whole spices such as cinnamon, nutmeg, and cardamom along the zester to create freshly ground spices. Freshly ground spices are much more intense than store-bought ground spices, so be cautious and make sure to taste as you go.
- Grating Fresh Ginger
If you enjoy homemade Asian cooking like I do, you’ve probably faced the task of chopping fresh ginger. This is not exactly our idea of a good time and can be a bit labor-intensive when chopped traditionally. Once you peel a piece of fresh ginger, simply rub it on your zester and you’ll have beautifully grated ginger in no time.
- Chopping Fresh Garlic
If you use a zester to grate your garlic, you’ll end up with a wonderful garlic paste that can easily be incorporated into your favorite dishes, and no fancy knife skills are required!
Grating Hard Cheeses
It’s easy to quickly grate hard cheeses with a zester. Rub a piece of cheese on the zester, and like magic, you’ll have finely grated cheese that melts like a dream.
- Chocolate Shavings
Looking to brighten up your desserts but don’t have time for fancy chocolate curls? Just run your favorite chocolate along the zester to create chocolate shavings.
What Type of Zester to Choose
Aspiring chefs should consider adding a zester to their toolbox. Whether you’re a fan of citrus or want to sprinkle Parmesan on pasta dishes, you need a zester on hand.
- Considerations When Choosing Zesters
- Types of Zesters
There are two main varieties of zesters. A traditional zester has a single row of holes designed to remove citrus zest without grabbing the bitter pith at the same time. A zester with a grater-type design looks similar to a cheese grater.
But with miniature holes. It is a much more versatile tool than a traditional zester. Regardless of the type of zester you choose, go for a durable stainless steel model for a sharp and long-lasting blade with rust resistance.
- Ease of Cleaning
If you forget to rinse your zester after meal preparation, food dries and hardens quickly, making it almost impossible to clean all the holes of the zester. Choose a zester that is dishwasher safe to avoid having to scrub those tiny holes.
- Features
- Hole Size
Smaller holes result in a finer zest (or grate). The choice is yours, whether you prefer very fine shavings or are looking for something that produces a thicker result. Some units have different hole sizes, so you have the option to make your various selections.
- Handling
It’s essential that you have a firm grip on your zester while zesting or grating food. A zester should be comfortable to hold and should not slip during use. Models with rubber handles offer the best grip.
- Blade Length
A long blade allows you to grate or zest more in one pass, but it can also be harder to use.
- Hanging Loop
If you have limited drawer space or simply prefer to keep your kitchen utensils within reach, choose a zester with a hanging loop and place it on a hook somewhere in your kitchen.
- Protective Cover
A cover protects your hands from the blades when you’re searching for what you need in your kitchen utensil drawer. It also protects your zester from tarnishing over time.
- The Knife
If you opt for a traditional zester, choose one with a channel knife. This type of built-in blade allows you to peel strips or spirals from citrus fruits.
Caring for Your Zester
Before storing your zester, wash and dry it thoroughly to prevent rust formation. Do not use abrasive scouring pads to clean your zester, as this could have negative effects on the blades. Prevent food from drying and getting stuck in the holes of your zester by rinsing it immediately after use.
How Much Does a Zester Cost?
A zester typically costs between 5 and 15 euros. Cheap zesters usually have fragile plastic components and blades that dull faster than higher-end models. You pay more for a zester with ultra-sharp blades and an ergonomic handle.
Canneler
Used in patisserie and bakery labs, as well as in the kitchen, the canneler is used to decorate dishes using vegetables or fruits. It is also called a zester, as they operate under the same principles.
Using the Canneler
Characterized by its small size and practicality, you can use a canneler at home during your cooking, as well as in professional kitchens, to add more design to your various fruits and vegetables.
Use the canneler to decorate your oranges, lemons, as well as your carrots and zucchinis. You can create all sorts of shapes with your canneler, such as curves, lines, etc. Don’t worry, because with its small size, it is impossible to remove the flesh of your fruits, vegetables, and citrus. Here’s what you need to do:
- Hold the citrus, fruit, or vegetable in your hand.
- Press the canneler onto the fruit, vegetable, or citrus, just like you would with a peeler.
- Make movements from top to bottom.
- Repeat the motion with a 1 cm interval until you go all the way around your fruit, vegetable, or citrus.
At the end of your work, you’ll see a beautiful design for decorating your dishes or cocktails.
Different Types of Cannelers
According to the way they are used, we have two types of cannelers:
- Right-handed Canneler
- Left-handed Canneler
Mostly made of steel, the blade can be curved or straight. It can also come in various shapes, such as V, U, etc. You can make your choices according to your preferences.
Conclusion
We can observe a large number of products on the market today. It might seem impossible to judge which would be the best vegetable peeler, zester, or canneler. We hope this guide has helped you understand what to look for to have the perfect kitchen tools for your needs.