









Buying Guide: Which Bread Dough Mixer or Bread Kneader Should You Choose?
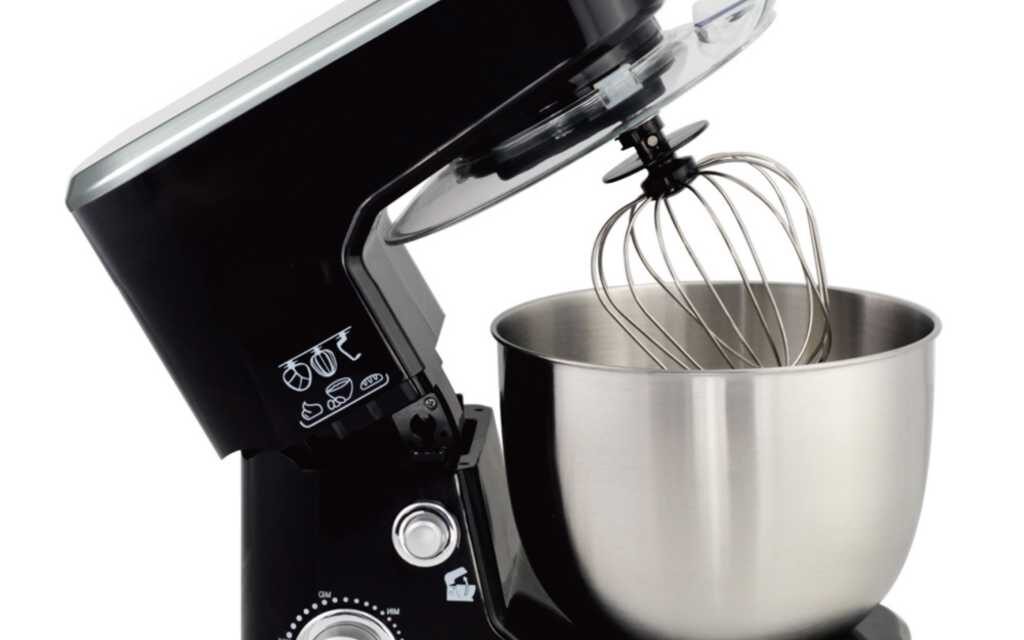
What is a bread dough mixer or bread kneader?
Most bakers are familiar with this machine. Bread dough mixers are perfect for most doughs, especially for cookies, cakes, dough, and even pizza dough. A bread kneader is designed so that the mixing arm rotates around the mixing bowl.
At the same time, the hook (or paddle) attachment rotates itself. Bread dough mixers have a fixed mixing bowl and usually a single motor. A bread dough mixer has a fixed kneading hook.
Which rotates in place (usually near the base of the mixer) while the bowl spins. This means that a bread kneader usually has two motors—one to control the rotation of the kneading hook and one to spin the bowl.
A bread kneader is incredibly efficient at quickly strengthening bread dough. It also tends to keep the dough temperature low due to its design, as the spiral hook rotates to efficiently develop the dough without excessive movement.
Why do you need a bread dough mixer?
Owning a great stand mixer for your bread-making experiments is essential for achieving positive results when making bread. Otherwise, without a mixer for your bread dough, you may experience more complications than any food blog would ever admit.
- Reduce the mess with a bread kneader
Making bread dough with a bread dough mixer can significantly reduce the mess you might make with an old bowl and mixing spoon. All your ingredients go into the mixer bowl.
And there’s no need to take the dough out of the kneader to knead it. With the use of the kneading hook, you can forget about covering your countertops with flour and sticky dough.
Knead hands-free directly in your mixing bowl. With a lid and a splash guard, bread dough mixers make cleaning even easier. Many mixer components are dishwasher-safe, non-stick, and easy to wipe clean.
- Keep bread light and fluffy
A major problem many home bakers face when making yeast-based bread is density. When kneading by hand, it’s much easier to over-knead your bread dough.
However, it can be difficult to ensure that all the dough is kneaded evenly when working by hand. Many people tend to over-knead their yeast-based dough. Yeast creates air pockets in the bread.
Giving bread the light and fluffy texture we all look for when baking bread from scratch. But when yeast-based dough is over-kneaded, these air pockets break down. This can result in bread that is too dense.
Dense bread doesn’t bake well, and dense bread usually doesn’t taste as good. The bread dough mixer is so effective at incorporating all the ingredients and kneading the dough evenly that many bakers have found their dough no longer needs a second rise.
- Bread dough mixers mix ingredients evenly
Have you ever tasted fresh bread only to bite into a clump of unmixed ingredients, like a lump of baking powder? If this hasn’t happened to you yet,
Trust us, it’s not a pleasant taste. Instead of mixing your bread dough ingredients with whatever is handy, a bread kneader will help you achieve an even mix.
This eliminates human error from the mixing equation and ensures that you won’t have any under-mixed surprises.
- Reduce kneading time
While some bread doughs don’t need kneading, many others require multiple kneading cycles. This means you have a rather exhausting task where you have to continuously sprinkle flour on your work surface to prevent your dough from sticking while kneading.
With a mixer, you don’t need to scrape your dough off a flour-covered countertop and struggle with it. Just attach the kneading hook, and you can knead in a fraction of the time.
That it would normally take to knead by hand. If you’re ready to improve your bread dough game, don’t hesitate to get a bread dough mixer and start making the best bread dough ever.
How to knead dough with a bread dough mixer?
If you don’t want to knead dough by hand, try this tip. For less arm workout when kneading dough, try using a bread kneader. The process is super simple.
- Step 1: Prepare your mixer
When your dough is mixed and ready for kneading, set up your stand bread dough mixer with the kneading hook. Place the dough into the bowl.
- Step 2: Knead the dough
Turn your mixer on at low speed. Let the dough knead for 3 minutes or until it clings to the hook and cleans the sides of the bowl. Continue kneading for another 3–4 minutes. You’ll know your dough is well-kneaded when it looks elastic and smooth.
Test Kitchen Tip: Check it often to avoid over-kneading. This can create too much gluten, resulting in tough and doughy bread.
How to choose the perfect commercial bread dough mixer?
When determining which commercial bread kneader is right for you, there are many important factors to consider, whether for a commercial or industrial bakery.
There is a perfect kneader for every need. Many different mixing styles exist, and each plays an optimal role in the production space. So, what’s the right choice for you?
- The planetary mixer
Undoubtedly the most widely used type of commercial dough mixer in bakeries worldwide, the planetary mixer is more of a one-size-fits-all dough mixer. These mixers always come with interchangeable tools.
Like a kneading hook, a spiral, and a whisk, as well as an interchangeable stainless steel bowl. These mixers are usually designated and sized based on their bowl volume rather than their capacity.
Because the specific weights of doughs vary greatly. The mixing action occurs by rotating the tool against the stationary mixing bowl. This type of mixing action is generally best suited for doughs.
And doughs with relatively high-fat content that are not leavened. This is mainly due to the higher levels of friction and heat input generated by the rotating tool.
With a stationary bowl. Although this type of mixer can produce quality leavened doughs, the margin for error is relatively small due to the high amount of heat input.
- The Spiral Mixer
Spiral mixers are the favorites of most artisan bakers due to their ability to minimize heat input into leavened doughs and properly develop gluten structure without overloading the dough.
These commercial mixers are designed with powerful drive motors and robust gearboxes that provide high torque, allowing them to be used even with low-absorption doughs.
Additionally, spiral mixers can also properly handle even very small amounts of dough compared to their maximum capacity (as low as 10% in some cases). Spiral mixers are most often named based on the maximum weight of dough that can be processed in each batch.
- Disadvantages
The disadvantage of spiral mixers lies in their flexibility and versatility regarding the types of doughs they can handle. With spiral mixers, the mixing action occurs through the simultaneous rotation of the spiral kneading hook and the stainless-steel mixing bowl. This results in only small portions of dough being mixed at any given time.
Meanwhile, the rest of the dough in the bowl has time to rest between kneading. This design also tends to provide very fast dough development with a relatively large margin for error in case of overmixing.
- Diving Arm or Twin Arm Mixers
Diving arm or twin arm mixers are more commonly found in Europe as they are better suited for high-hydration doughs or doughs containing European flours with lower protein content.
They are gaining popularity nowadays. This type of commercial dough mixer offers the gentlest form of mechanical dough mixing available, with virtually no heat input.
These machines develop the dough very slowly, as the movement of the mixing tools closely mimics the hand-kneading process. The lack of intense friction also allows bakers to mix for longer durations for maximum gluten development without worrying about overmixing.
- The main disadvantages of this mixing style are:
- Extremely long mixing times and high energy consumption (sometimes 30 to 45 minutes or more per mix).
- They are best suited for very high-hydration doughs (or low-hydration doughs with very low protein content).
- They cannot handle small amounts of dough compared to their maximum capacity, unlike other types of mixers.
- The Fork Mixer
Fork mixers, like diving arm or twin arm mixers, are more commonly found in Europe. They also provide a very gentle mixing process that generates minimal friction and heat input into the dough.
There are two versions available on the market today: one with a motorized bowl (Italian type) and one with a freely rotating bowl (French type), which relies on the interaction between the mixing tool and the dough against the bowl for rotation. In both versions,
the fork mixing tool rotates slowly and essentially folds the dough over itself to ensure proper gluten structure development. Again, these very gentle mixing forms allow for longer mixing times to achieve maximum dough development without the risk of overmixing.
- Fork Mixers and Diving Arm Mixers
Fork mixers have a wider acceptable hydration range than diving arm mixers, although they are more commonly used with higher hydration doughs.
Fork mixers fall somewhere between spiral mixers and diving arm or twin arm mixers in terms of mixing times.
As a result, their mixing time and energy consumption are above average. They also tend to require batch sizes close to their maximum capacity.
What You Should Remember!
Overall, there is no single mixer style that can do everything perfectly, and each type of commercial dough mixer has its specialty. The important factors to consider
when choosing a mixer or mixing system are the types of products to be produced (and their absorption or hydration range), the desired quality level of the final products, the available resources or capital, and the space available in the bakery.
How to Choose Your Bread Dough Mixer?
Using a bread dough mixer instead of kneading by hand can save home bakers a lot of time and energy. They ensure faster and more efficient kneading.
But not all bread dough mixers can handle thick dough. So, let’s get straight to the point. Here are the key factors you should consider when shopping for the best stand mixers for bread dough:
- Motor Speed and Power
The higher the motor power, the stronger the mixer (meaning it can handle thicker and heavier bread dough). Ideally, you should also look for a bread dough mixer with a few slow-speed options to prevent ingredients from flying out of the bowl at the start.
- Capacity
It goes without saying: the larger the bowl of a stand mixer, the more bread batches you can prepare at once.
- Material
If you want to invest in the most durable stand mixer, opt for a metal gear-driven mixer, which is generally more durable than its plastic counterparts. Keep in mind that more durable mixers are usually more expensive.
Your Budget
If you plan to use a bread dough mixer frequently or want one that will last for years before needing a replacement, it may be worth investing in a more expensive but more durable model. However, if a stand mixer is just an occasional gadget in your kitchen, a low-cost version might be a better choice.
7 Essential Maintenance Rules for Commercial Bread Dough Mixers
Maintaining bread dough mixers is a crucial part of efficiently running a restaurant. However, it is often ignored or postponed in favor of seemingly more urgent matters. But what happens when the mixer breaks down due to accumulated debris? What if you have to replace or repair your mixer during peak hours? You won’t be happy.
And you’ll likely wish you had followed proper commercial mixer maintenance guidelines. Below are the seven key must-dos for keeping your mixer in working condition.
- Oil the Moving Parts
Lubrication is essential. You don’t have to oil the mixer daily, but it’s important to establish a schedule. Components such as the sliding bowl height adjustment should be oiled twice a year.
As soon as the gear housing starts to squeak, it also needs oil. A well-lubricated machine is less prone to breakdowns.
- Adjust the Agitator Height
Your mixer will operate more smoothly and deliver the desired results faster when the agitator height is correct. However, with daily use,
the mixer’s height may become misaligned. Refer to the machine’s manual for specific measurements and adjust the height accordingly.
- Disassemble It Occasionally
It’s always helpful to wipe down the mixer immediately after use. Deep cleaning every day isn’t practical, but you shouldn’t let years pass without one.
Make it a habit to regularly disassemble the mixer according to the manufacturer’s instructions—perhaps on a day when the restaurant or bakery is closed. This is the only way to truly clean the mixer, inside and out.
- Keep It Dry
Water is not good for the internal components of the mixer. Whenever you clean it with warm, soapy water, be sure to dry it completely immediately afterward.
Avoid using high-pressure cleaning techniques. Water could seep into the internal mechanisms, leading to rust and premature failure.
- Replace Worn Belts
When belts wear out, they are bound to break. The key is to replace them before that happens. Keep an eye on them with regular inspections and opt for replacements before repairs become necessary.
- Repair Faulty Seals
When seals start leaking, don’t delay—replace them! Contact a certified repair technician for assistance if you encounter issues beyond your expertise.
- Safety First
This may seem obvious, but never clean your mixer while it is plugged in. The risk of electric shock is high when water is involved. Inspect power cords for frays and punctures, and replace them if necessary.