








Homemade ice cream? Choose the best machine!
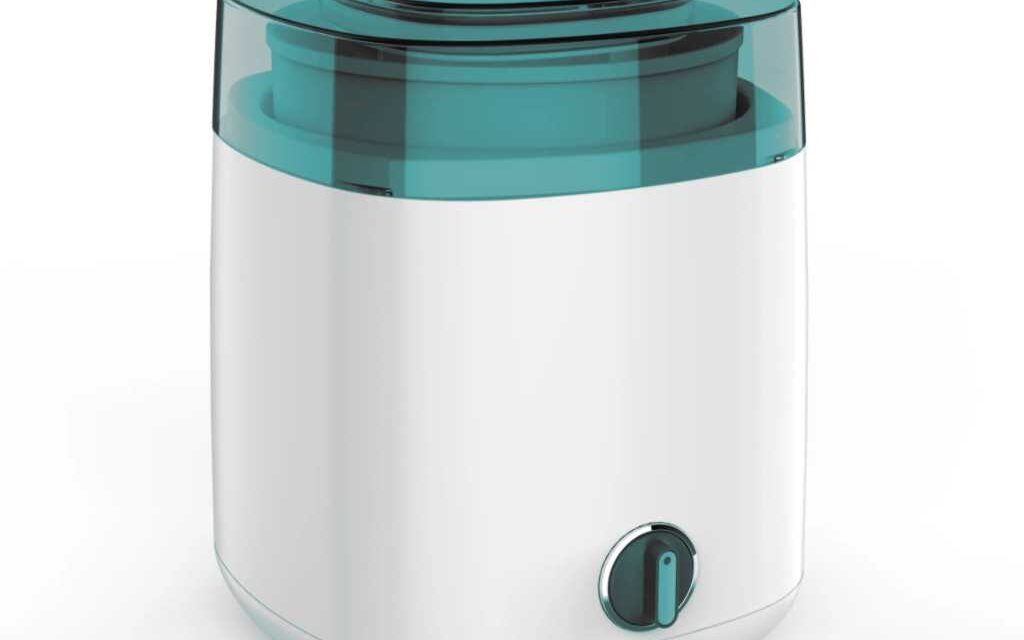
A little notion about the ice cream maker
You simply need to know that an ice cream maker is a device that allows you to make ice creams as well as sorbets.
How to use an electric ice cream maker?
Making homemade ice cream, fruity sorbet, or frozen yogurt for your family can be a lot of fun, especially in hot weather.
If you don’t have your instruction manual, here are some guidelines on how to use your ice cream maker to create cold and creamy ice cream as well as other frozen desserts at home.
- The rock salt model
These instructions apply to the traditional style of ice cream maker, which uses rock salt and ice in an outer bucket and churns the ice cream in a refrigerated canister. Although these models are electric (no more hand cranking required), you also have ice cream makers that use gel-filled canisters. These models resemble small appliances, automatically churning the ice cream inside the frozen container.
Since the method differs for gel-based models, it is recommended to consult the manufacturer for usage instructions.
- Preparing the ice cream
You will get the best results from your ice cream maker if you plan ahead:
- Prepare your favorite ice cream, sorbet, or frozen yogurt recipe. Chill the mixture in the refrigerator for an hour or two.
- Let the ice cream maker’s canister cool in the refrigerator while the mixture is chilling.
- Ensure you have enough crushed ice and rock salt ready.
Any recipe can be made lower in fat by changing the main ingredient (milk or cream). Replace whole milk with 1% milk, whole milk with half-and-half, and evaporated skim milk or half-and-half with cream.
Make these adjustments according to your personal preferences. Keep in mind that the higher the fat content, the smoother and creamier the texture. Low-fat recipes yield a refreshing, lighter dessert with a less creamy texture.
Using the ice cream maker
Once everything is well chilled, it’s time to make ice cream!
- Pour the chilled ice cream mixture into the chilled ice cream canister.
- Fill the canister up to 3/4 full. The mixture will expand during the churning process, so do not overfill.
- Insert the dasher, ensuring it is properly positioned in the indentation of the canister.
- Place the lid on the ice cream canister.
- Put the filled canister into the bucket, making sure it is centered and engages with the bottom of the bucket.
- Place the motor drive on the lid of the ice cream canister so that the dasher shaft engages with the hole in the bottom of the motor drive.
- Plug the ice cream maker into an outlet.
- While the machine is running, add 2 inches of crushed ice to the bottom of the bucket.
- Sprinkle about 1/4 cup of rock salt over the crushed ice.
- Continue layering crushed ice and rock salt until the ice level reaches the top of the rotating ice cream canister.
- Wait about 20 to 40 minutes for the ice cream maker to stop churning. The ice cream will be soft at this stage.
- Remove the motor drive, then take out the canister.
- Carefully clean the canister lid to prevent salt or water from getting inside.
- Lift the dasher and scrape it with a spatula.
- Transfer the ice cream into the canister and replace the lid.
- Place the ice cream canister in the freezer for several hours until the ice cream hardens.
- Transfer the finished ice cream into smaller freezer containers or enjoy it immediately.
6 reasons why you should own an ice cream maker
- It’s healthier
Not only will the ice cream you make with your own machine be much healthier than store-bought ones, but it will also be healthier than the “no-churn” ice cream recipes that are so popular these days.
Store-bought ice creams are often full of preservatives, which you won’t need in homemade ice cream (since it’s likely to be eaten quickly!). They can also contain a high sugar content.
Sugar is important in ice cream, but you don’t need as much as in commercial ice creams. No-churn ice cream recipes are great and easy to make, but because they don’t require a machine, they have to be full of fat. Otherwise, you wouldn’t be able to incorporate air before freezing them. Again, they are high in sugar, as it also helps with texture when no machine is involved. With an ice cream maker, you can reduce sugar and fat while still achieving great results.
- It tastes better
Because you have complete control over the ingredients, you can make ice cream exactly how you want it, with all the flavors and ingredients you love—including those you’d never find in stores!
Freshly made ice cream is softer and tastes fresher. Since you don’t need to use unhealthy fat levels as required in no-churn ice creams, the flavors can be stronger and more vibrant.
In short, an ice cream maker gives you much more control over the taste of your ice cream, allowing you to create exactly what you want, just the way you like it. You can’t do that without a dedicated machine.
- Sorbets, slushies, frozen Margaritas
Despite its name, an ice cream maker isn’t limited to ice cream. You can also make a wide range of other frozen treats, including dairy-free sorbets, slushies, and frozen cocktails.
Sure, you can make sorbets and granitas without an ice cream maker, but it’s a long and difficult process, and the results will never be as good as those from a proper machine.
- It’s cost-effective!
If you consume ice cream regularly, making your own will save you a lot of money. Especially considering that one of the best machines is available for less than 45 euros and will last a lifetime!
- Go dairy-free
With more and more people looking to reduce or eliminate their dairy intake, dairy-free ice creams are becoming increasingly popular.
A little notion about the ice cream maker
You simply need to know that an ice cream maker is a device that allows you to make ice cream and also sorbets.
How to use an electric ice cream maker?
Making homemade ice cream, fruity sorbet, or frozen yogurt for your family can be a lot of fun, especially on a hot day.
If you don’t have your instruction manual, here are instructions on how to use your ice cream maker to make cold and creamy ice cream, as well as other frozen desserts at home.
- The rock salt model
These instructions apply to the traditional style of ice cream maker, which uses rock salt and ice in an outer bucket and churns the ice cream in a refrigerated canister. Although these models are electric (no more hand cranking required), you also have ice cream makers that use canisters filled with gel.
These models look more like small appliances, automatically churning the ice cream in the frozen canister. Since the method is different for gel models, it is recommended to consult the manufacturer for usage instructions.
- Preparing the ice cream
You will get the best results from your ice cream maker if you plan ahead:
- Prepare your favorite ice cream, sorbet, or frozen yogurt recipe. Chill the mixture in the refrigerator for an hour or two.
- Let the ice cream maker’s canister cool in the refrigerator while the mixture chills.
- Make sure you have enough crushed ice and rock salt ready.
Any recipe can be made lower in fat by changing the main ingredient (milk or cream). Replace whole milk with 1% milk, whole milk with half-and-half, and evaporated skim milk or half-and-half with cream.
Make these adjustments according to your personal preferences. Keep in mind that the higher the fat content, the smoother and creamier the texture. Low-fat recipes result in a refreshing, lighter dessert with a less creamy texture.
Using the ice cream maker
When everything is well chilled, it’s time to make ice cream!
- Pour the chilled ice cream mixture into the cooled ice cream canister.
- Fill the ice cream canister up to 3/4 full. The mixture will expand during the churning process, so don’t overfill it.
- Insert the dasher, making sure it is properly positioned in the canister’s indentation.
- Place the lid on the ice cream canister.
- Place the filled canister into the bucket, ensuring it is centered and engages with the bottom of the bucket.
- Attach the motor drive to the ice cream canister lid so that the dasher shaft fits into the hole at the bottom of the motor drive.
- Plug in the ice cream maker.
- While the machine is running, add 2 inches of crushed ice to the bottom of the bucket.
- Sprinkle about 1/4 cup of rock salt over the crushed ice.
- Continue layering crushed ice and rock salt until the ice level reaches the top of the rotating ice cream canister.
- Wait about 20 to 40 minutes for the ice cream maker to stop churning. The ice cream will be soft at this stage.
- Remove the motor drive, then take out the canister.
- Carefully clean the canister lid to prevent salt or water from entering the canister.
- Lift the dasher and scrape it with a spatula.
- Transfer the ice cream into the canister and replace the lid.
- Place the ice cream canister in the freezer for several hours until the ice cream hardens.
- Transfer the finished ice cream into smaller freezer containers or enjoy immediately.
6 reasons why you should own an ice cream maker
- It’s healthier
Not only will the ice cream you make with your own machine be much healthier than store-bought ice cream, but it will also be healthier than the “no-churn” ice cream recipes that are so popular these days.
Store-bought ice cream is often full of preservatives that you won’t need in homemade ice cream (which is likely to be consumed quickly!). It may also contain a significant amount of sugar.
Sugar is important in ice cream, but you really don’t need as much as in commercial ice cream. No-churn ice cream recipes are great and easy to make, but since they don’t use a machine, they have to be full of fat to incorporate air before freezing. Again, they are high in sugar because it helps with texture. With an ice cream maker, you can reduce sugar and fat while still getting great results.
- It tastes better
Since you have complete control over the ingredients, you can make ice cream exactly the way you like it, with all your favorite flavors, including those you’d never find in a store!
Freshly made ice cream is smoother and has a fresher taste. You don’t have to use unhealthy fat levels, so the flavors can be stronger and brighter.
In short, an ice cream maker gives you much more control over the taste of your ice cream, allowing you to make exactly what you want, just how you like it. You can’t do that without a dedicated machine.
- Sorbets, slushies, frozen margaritas
Despite its name, an ice cream maker is not just for ice cream. You can also make a variety of other frozen treats, including dairy-free sorbets.
Slushies and frozen cocktails are also easy to make. You can make sorbets and granitas without an ice cream maker, but it’s a long and difficult process, and the results will never be as good as with a proper machine.
- It’s cost-effective!
If you consume ice cream regularly, making your own will save you a lot of money, especially considering that one of the best machines costs less than 45 euros and lasts a lifetime!
- Go dairy-free
More and more people are looking to reduce or eliminate dairy from their diets. However, there aren’t many decent dairy-free ice cream options in stores. An ice cream maker doesn’t care if you use dairy or not! Coconut milk, cashew milk, oat milk—with the right recipe, almost any non-dairy milk can be whipped into ice cream.
- Use overripe fruit
The best fruit ice cream is made from overripe fruit—too ripe to eat on its own. Normally, you’d end up throwing this fruit away, but with an ice cream maker, you can blend it into a creamy base, and voilà!
You have one of the best ice creams you’ll ever taste! If I’ve convinced you that you need an ice cream maker, don’t hesitate to get one.
Can you rent an ice cream maker?
Commercial soft-serve ice cream machines are available for rent for parties and special events. However, we are not aware of countertop ice cream maker rentals for home kitchens.
If you’re unsure whether you’ll use an ice cream maker enough to justify the cost, consider an affordable or manual model. Be sure to check warranties and return policies in case of issues or a change of mind.
To make different styles of ice cream from other models. While it is great to have options and versatile appliances, sometimes you just need a basic model that does its job well.
- The ability to make multiple batches
The type of ice cream maker you choose will determine if you can make multiple batches in a row. Freezer bowl models require the bowl to be frozen before use, and most can only make one batch of ice cream before the bowl needs to be re-frozen.
If an extra freezer bowl is included, it will be easier to make multiple batches back to back. Compressor models can produce a second or third batch more easily. Salt and ice models can also accommodate a larger quantity based on your needs.
As long as you have enough ice and salt to keep the machine cold. While you can theoretically make endless batches of ice cream with some ice cream makers, continuous churning of hard ice cream can stress and overheat the motor of less durable models.
If you regularly want to make multiple batches of ice cream for parties or events, a low-end commercial model may be a better purchase than a model designed for lighter home use.
- The power source
Electric ice cream machines do all the churning for you, so making ice cream is as simple as adding the ingredients, pressing the start button, and waiting for the ice cream to be ready. These machines are easy to use, much like other convenient kitchen appliances such as slow cookers.
Manual machines require more work (and muscle), as churning ice cream can take 20 minutes or more, and the process becomes harder as the ice cream thickens. Since they don’t need to be plugged in, manual ice cream makers are portable.
You can take one to backyard parties, camping trips, and beach outings, letting everyone—including kids—help out. Some manual models are even simpler to use, requiring only mixing ingredients in a freezer bowl.
- The freezing style
Many ice cream makers use a freezer bowl or insert that must be frozen before ice cream can be churned. If you don’t have enough freezer space, this can be a challenge.
If you want to make multiple batches of ice cream, know that compressor models allow you to make one batch after another. However, they tend to take up more space and are more expensive. There are also ice cream makers that use the traditional ice and salt freezing method.
Price
On average, you can find many decent electric ice cream makers between 50 and 100 euros. Some of the simplest ice cream makers are available for under 30 euros, while heavy-duty compressor models that function like mini freezers can cost several hundred euros.
Although supplies aren’t expensive, traditional salt and ice ice cream makers will require you to buy salt and ice bags each time you want to make ice cream.
- Warranty
The average warranty for manufacturing defects on most ice cream makers is one year, though you can find some with longer or shorter warranty periods. Manufacturing defects are likely to appear early in the product’s life cycle.
Later failures are more likely to be caused by daily wear and tear, which would not be covered by a standard warranty. A quality ice cream maker that has not been misused should generally last well beyond its warranty period.
However, if you have bad luck with kitchen appliances or want coverage in case of accidental breakage, you can purchase extended warranties for most electronic appliances. Be sure to read the device’s instructions before committing.
Extended warranties typically start on the date of purchase but cannot be used until the manufacturer’s warranty expires.
Types of Ice Cream Makers
- Salt and Ice
While hand-crank salt and ice machines have existed since the mid-1800s, some of these models require manual cranking to rotate the paddle, while others are electric and will churn for you.
If you want to make multiple batches, you just need to clean the machine, add more ice, salt, and ice cream ingredients, and start churning again. If you opt for this style, you will need plenty of ice and salt on hand.
Keep in mind that if these ice cream makers are overfilled with ice, the cold salty water can seep into the ice cream mixture and ruin it. Many salt and ice-style ice cream makers come in larger capacities than other styles designed for home use.
- Freezer Bowl
Freezer bowl ice cream makers are the most popular for home use. Most are electric, so they are easy to use and take up little counter space. The freezer bowls must be placed in the freezer well before churning—usually for at least eight hours.
You need to plan ahead or store the freezer bowl in the freezer so that it is always ready to use. The ice cream mixture should also be chilled before churning.
Otherwise, it may not freeze as solidly as desired before the bowl starts to lose its cold. Churning a single batch of ice cream typically warms the bowl enough that it cannot be used for a second batch.
Some ice cream makers include a second freezer bowl (or you can buy one separately), allowing you to make two different batches of ice cream one after another. The only downside is that multiple freezer bowls take up even more space in the freezer.
- Compressor
Compressor ice cream makers function like small freezers. Instead of pre-cooling before churning, these models begin cooling after the ice cream mixture is added. Some machines can also be pre-refrigerated before adding ingredients.
These machines typically have more features, with settings to make ice cream, sorbets, and more. You can find compressors with timers to remind you when to add mix-ins and/or keep-cool functions.
That will keep the ice cream cool. If you cannot immediately transfer the ice cream to the freezer once churning is complete, this type of machine is the simplest for making multiple batches, as you only need to clean the bowl between batches.
These machines tend to be the most expensive and are also much larger and heavier than other ice cream makers. While a compressor-style ice cream maker may be excessive for most home kitchens, they produce excellent ice cream and are always ready to go.
- Soft Serve
Soft serve ice cream machines are designed to both churn and dispense ice cream and frozen yogurt. These models typically come with a freezer bowl and work similarly to freezer bowl-style ice cream makers.
However, they are designed to keep the ice cream at a higher temperature so that it doesn’t harden as much and remains smooth and, well, soft. A lever allows you to dispense the soft serve directly into a cup or cone.
Some models even feature topping dispensers, so you can mix in sprinkles, nuts, or candy pieces when filling your dish. Soft serve machines are a favorite among kids who love making their own ice cream cups.
Accessories
Ice cream makers typically do not come with major accessories, though some may include ice cream scoops, extra bowls, or additional paddles. You will need a spatula or spoon to remove the ice cream from the machine and a freezer-safe container to store the finished product.
If you want to take your ice cream making to the next level, you might consider investing in special molds for making ice cream bars and a high-quality ice cream scoop. Toppings like sprinkles, fudge sauce, sundae dishes, and milkshake glasses can also be fun extras to have.
How do you clean an ice cream maker?
Before using and cleaning your ice cream maker, always consult the instruction manual for recommendations and best practices on how to clean each part. Most ice cream makers are not dishwasher-safe.
You will need to hand-wash the freezer bowls, paddles, and lids using warm, soapy water and mild detergents. Freezer bowls should not be placed in the dishwasher, as high temperatures can damage the insulated seal and cause the coolant liquid to leak.
Conclusion
Two of the most important factors to consider when choosing an ice cream maker are the freezing method you prefer and how much ice cream you will make regularly. You should also consider your budget.
The amount of space you have and the capacity of the machines you are considering. If you have limited space and/or only want to make homemade ice cream occasionally with minimal user involvement, an electric freezer-style model should meet your needs.
However, if you want to make large quantities of ice cream or involve the whole family in the process, you will likely benefit more from a traditional ice and salt model or a compressor ice cream maker.